
Hello THLZ fans! It is I, Levi, and my battle-buddy, Jason A, from The HotLZ Podcast! Today we bring you a written battle report of my first 1500 point game against Jason’s PHR. Read on and enjoy!
Big shout out to Ian Gilbraith at WargamingMats for supplying the vinyl mat we used. It is a fantastic product. Light weight, matte finished, and durable. The models do not slide around, the mat quickly lays flat (even when cold because it was in the trunk of a car for a while). Another good thing is for us US gamers, he can have them printed and shipped stateside, which means CRAZY CHEAP MATS THAT ARE REALLY HIGH QUALITY. Seriously though, check him out on Facebook, or go to his eBay store directly. He’s got a ton of designs in both 6x4, 4x4, and formats for a few other games. I received my mat within 3 days of it being shipped and I live in Kansas. I was a little hesitant about the vinyl material because I’ve never seen it before, but if you have seen the Chessex square grid mats that RPGs sometimes use, it’s the same material, but thicker. If you can’t afford (or don’t want to shell out the cash) for other mat materials, like mouse mat, then give this guy a look-see. It’s good stuff!
Big shout out to Ian Gilbraith at WargamingMats for supplying the vinyl mat we used. It is a fantastic product. Light weight, matte finished, and durable. The models do not slide around, the mat quickly lays flat (even when cold because it was in the trunk of a car for a while). Another good thing is for us US gamers, he can have them printed and shipped stateside, which means CRAZY CHEAP MATS THAT ARE REALLY HIGH QUALITY. Seriously though, check him out on Facebook, or go to his eBay store directly. He’s got a ton of designs in both 6x4, 4x4, and formats for a few other games. I received my mat within 3 days of it being shipped and I live in Kansas. I was a little hesitant about the vinyl material because I’ve never seen it before, but if you have seen the Chessex square grid mats that RPGs sometimes use, it’s the same material, but thicker. If you can’t afford (or don’t want to shell out the cash) for other mat materials, like mouse mat, then give this guy a look-see. It’s good stuff!
1500 Point Shaltari v. PHR
Scenario 6: Grid Control
Approach: Column
Fleet Lists Below
Shaltari Fleet
Disintegrator Banks For Days - 1482pts
Shaltari - 4 launch assets
|
PHR Fleet
Launch Heavy
1495pts
PHR - 6 launch assets
|
SR12 Vanguard battlegroup (290pts)
1 x Adamant - 200pts - H
2 x Topaz - 90pts - L
|
SR20 Vanguard battlegroup (365pts)
1x Leonidas w/ Vice Director 3AV - 195pts - H
1x Hector - 170pts - H
|
SR17 Vanguard battlegroup (365pts)
1 x Onyx - 165pts - H
1 x Amber - 110pts - M
2 x Topaz - 90pts - L
|
SR13 Vanguard battlegroup (300pts)
1x Bellerophon - 180pts - H
3x Europa - 120pts - L
|
SR10 Line battlegroup (245pts)
1 x Emerald - 100pts - M
1 x Basalt - 145pts - M
|
SR10 Line battlegroup (242pts)
1x Ganymede - 135pts - M
1x Orion - 107pts - M
|
SR9 Line battlegroup (307pts)
2 x Amethyst - 96pts - L
2 x Amethyst - 96pts - L
1 x Turquoise - 115pts - M
|
SR7 Line battlegroup (184pts)
1x Ajax - 100pts - M
2x Andromeda - 84pts - L
|
SR7 Pathfinder battlegroup (130pts)
3 x Voidgate - 45pts - L
3 x Voidgate - 45pts - L
1 x Opal - 40pts - L
|
SR7 Pathfinder battlegroup (208pts)
1x Orpheus - 130pts - M
2x Medea - 78pts - L
|
SR8 Pathfinder battlegroup (145pts)
3 x Voidgate - 45pts - L
1 x Emerald - 100pts - M
|
SR4 Pathfinder battlgroup (156pts)
2x Medea - 78pts - L
2x Medea - 78pts - L
|
Shaltari Pregame: With this being my first game at this size, I was betting money I was going to get smothered because I only had two Emerald’s and I knew he was going to way out number me on ground assets. (I just had no clue he was going to outnumber me as much as he did) I also seemed to struggle against PHR at the lower point levels, hence why I brought so many stinkin disintegrator banks. I wanted to try their effectiveness compared to Particle weapons. I also decided to put my Opal in a full group of gates to give it the flexibility needed to hop from group-to-group to support where needed without being chained down by coherency. Read on to find out how I did in my first 1500 point game, and how the disintegrator banks performed!
PHR Pregame: My thoughts going into the game with the amount of troopships, strike carriers, and launch assets was to over-saturate Levi’s ability to counter all of this. I knew that I would most likely be able to win the ground game by sending in 3 Medea’s on the flanks and both my troopships up the center. I didn’t know how many Basalt’s he was planning on bringing and so I wanted to counteract his ability to launch a large amount of fighters and bombers. I was planning on using my Leonidas and Hector together to strike at any target which threatened my troopships, however as you continue reading this did not go as planned.
Turn 1
Turn 1:
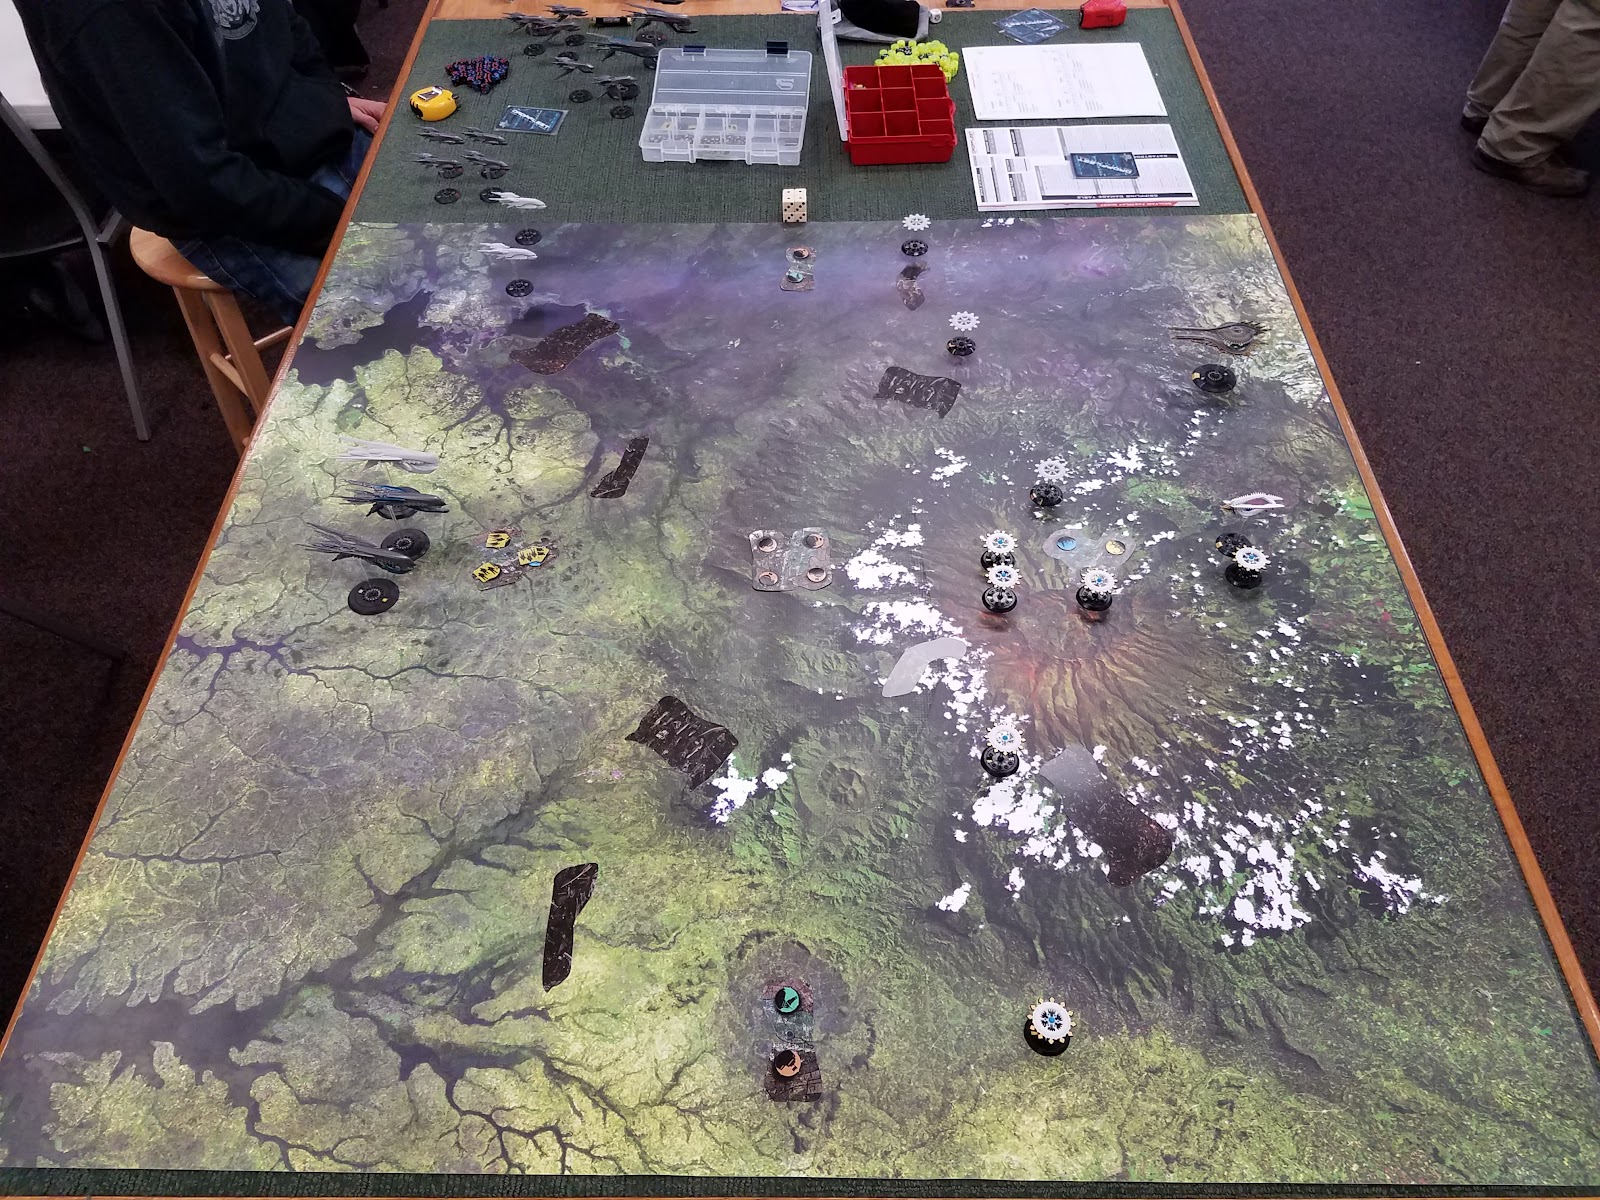
Shaltari- With it being column approach, I knew I wasn’t going to be able to get all of my gates and both Emeralds on the board. So I prioritized my gates. Although this did leave my Opal hanging around in the back, I just threw it in the middle of the board so I didn’t give away which side of the board I was going to concentrate on.
PHR- When I found out it was column approach I was not looking forward to this deployment setup. I have found that playing the PHR you want as much of your force to come on at the same time in order to assist the rest of the fleet. This is mainly due to not having as many forward-firing weapons as the other 3 factions. I decided I needed to send my troopships and Medea’s on the board early to try and get as much ground forces on the clusters before his gates arrived and I had to compete with the Voidgate shenanigans we are aware of (and hate). I landed as many troops as I could on the center cluster near me to get points later on while continuing to move my troopships forward.
Turn 2
Turn 2:
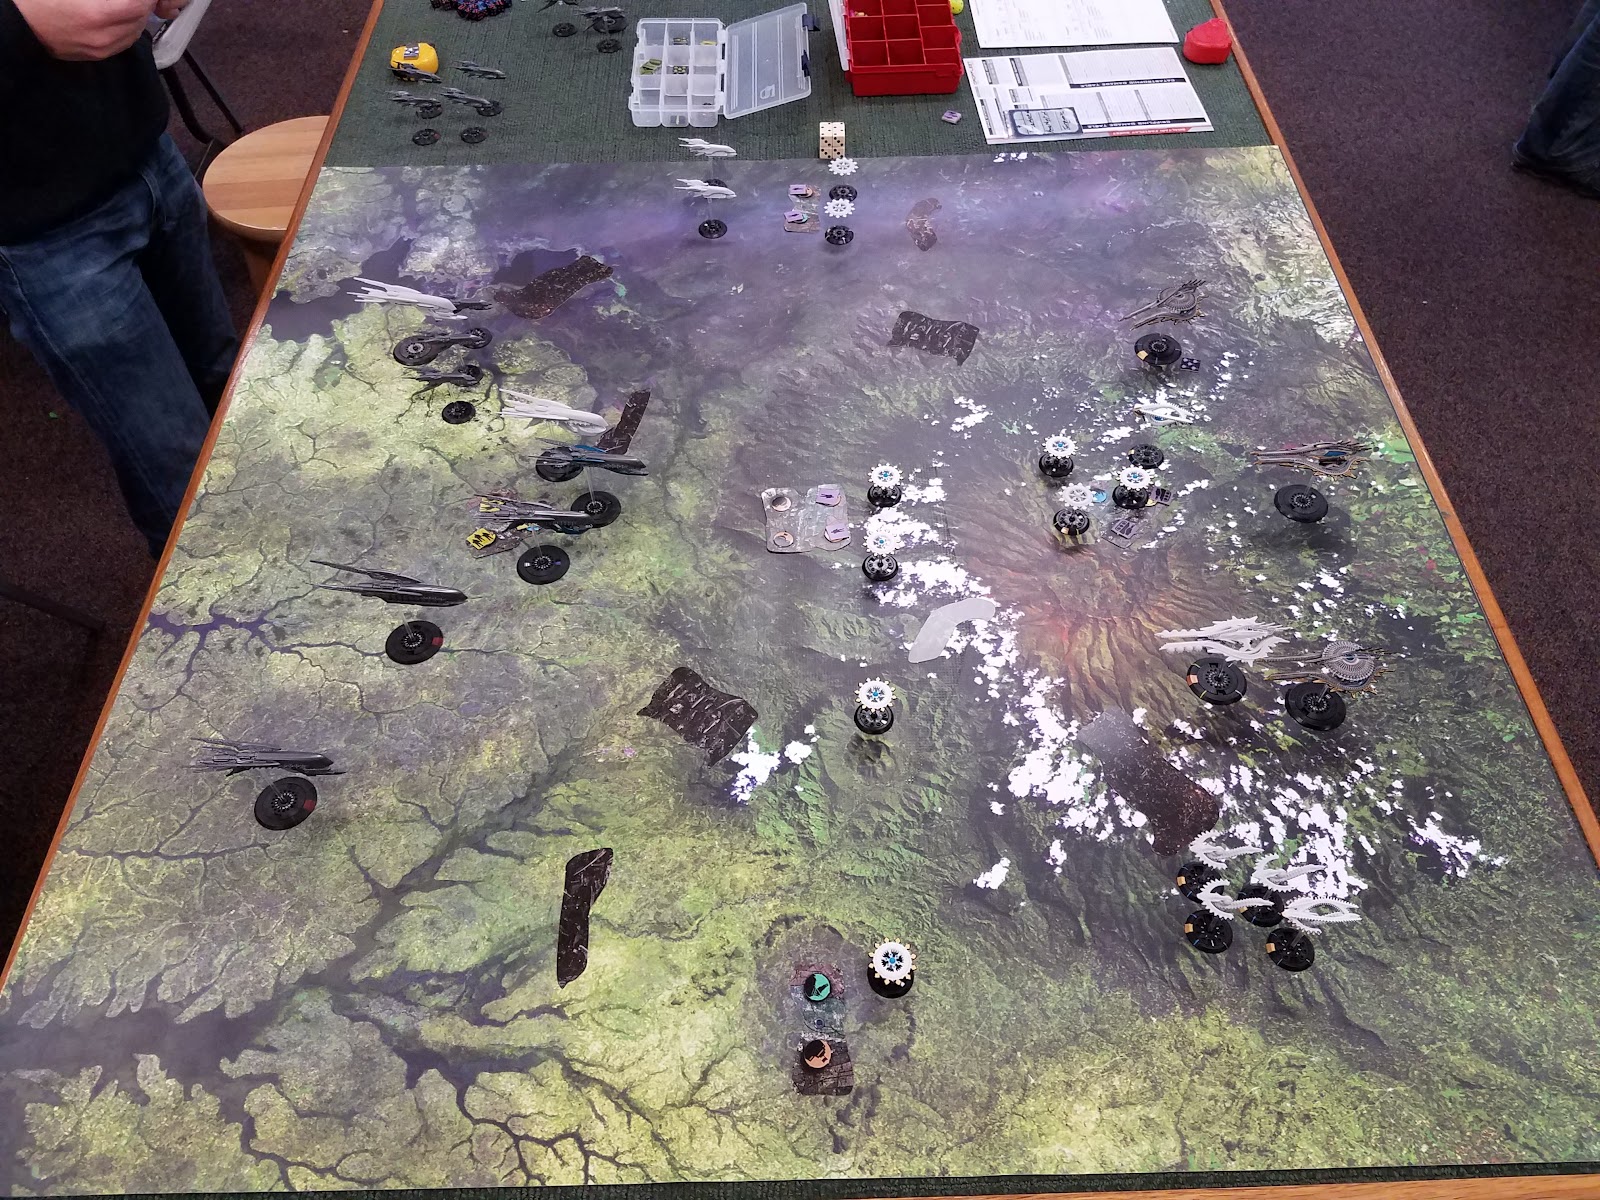
Shaltari- Turn 2 was a no brainer for my side. The mission: Get my other Emerald on the board. So I brought in the Emerald/Basalt group and they hung out in the back. I also decided to bring on my CA(Beam) Line BG. Since Jason had flipped the group Leonidas, I forced him to deploy first and then I let slip the dogs of war! Ground asset wise, I was able to lay down single troop tokens on both sectors of the far cluster (Got the Defense Laser and Military Sector), two more singles on the middle cluster, and finally two tanks on my home cluster.
PHR- I knew I was going to need some heavy firepower up with my troopships fast in order to provide the support they needed as they would be primary targets for Levi. Hence, I decided to bring on my SR20 battlegroup (BG) with my Leonidas and my Hector. These came up the center and I should have max thrusted with these in order to bring them closer to the frontline faster. I also wanted to get my Bellerophon on the table quickly in order to provide fighter/bomber support as needed.
Turn 3
Turn 3:
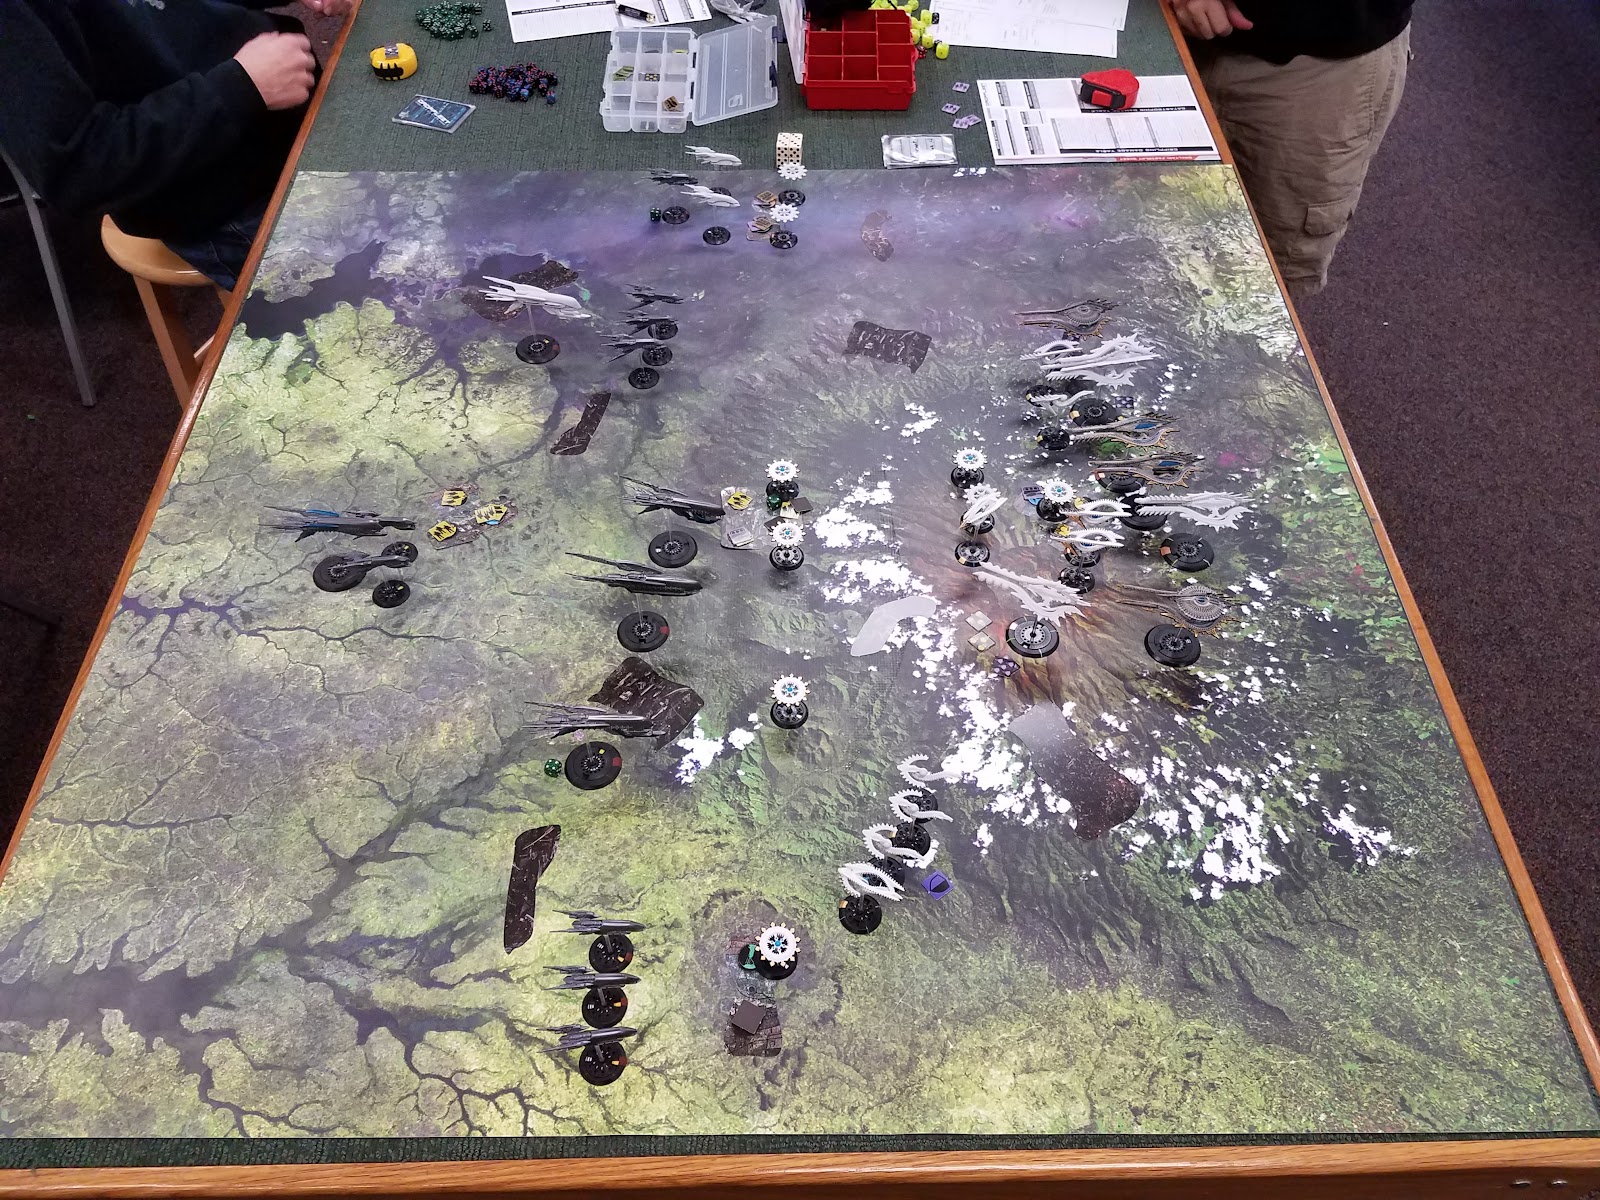
Shaltari - This turn my real mission had started: get rid of his troop carriers to bring us to an even playing field (ground deployment wise). And I feel I did a pretty good job at that. This was the turn that the rest of the fleets came on. So both of the Vanguard groups came on right up the middle so I could focus my fire if needed. Until this game I have never been able to actually remove a PHR cruiser in one turn. It took a good bit of firepower, but my Onyx/Amber/Topaz group had the ticket. They were able to remove the Ganymede and Orion. Funnily enough, it was actually the Orbital Decay that Jason failed (on a 1 mind you) which removed the troopship lol. My amethyst’s also did a little bit of work to the Hector. Only 4 hull, but that puts that cruiser that much closer to evaporation. They also raised shields this turn. I have been doing a poor job at managing that, and I wanted to keep from making that mistake this game. Ground Assets- On the far cluster I had shot the both the Military Sector and Orbital Defense Laser (at different targets - we agreed before the game that it just didn’t make sense to not allow the Military sector to fire at ships in atmo. The Laser could only fire in ships out of atmo.) I relocated an armored asset from my back cluster to the middle one, along with 2 fresh single troops. I was able to grab the Military on this side of the board, because the Laser would have been no use as of now.
PHR - This was the turn where things started decaying for me rapidly. I had moved my Ganymede and Orion up to the center cluster too fast in the game and this caused me problems with the ground fighting. Levi was able to take out my Orion in one turn and my Ganymede after I rolled a 1 on my Orbital Decay roll from low orbit. His Amethyst group did some damage to my Hector while I was unable to put effective firepower onto his ships. Again one of the difficult tactics of playing PHR, deciding whether to continue moving forward to be able to go weapons free; or course changing to get at least one broadside able to fire.
Turn 4
Turn 4: 25-23 Shaltari Victory. PHR Concede. Continued to play the game.
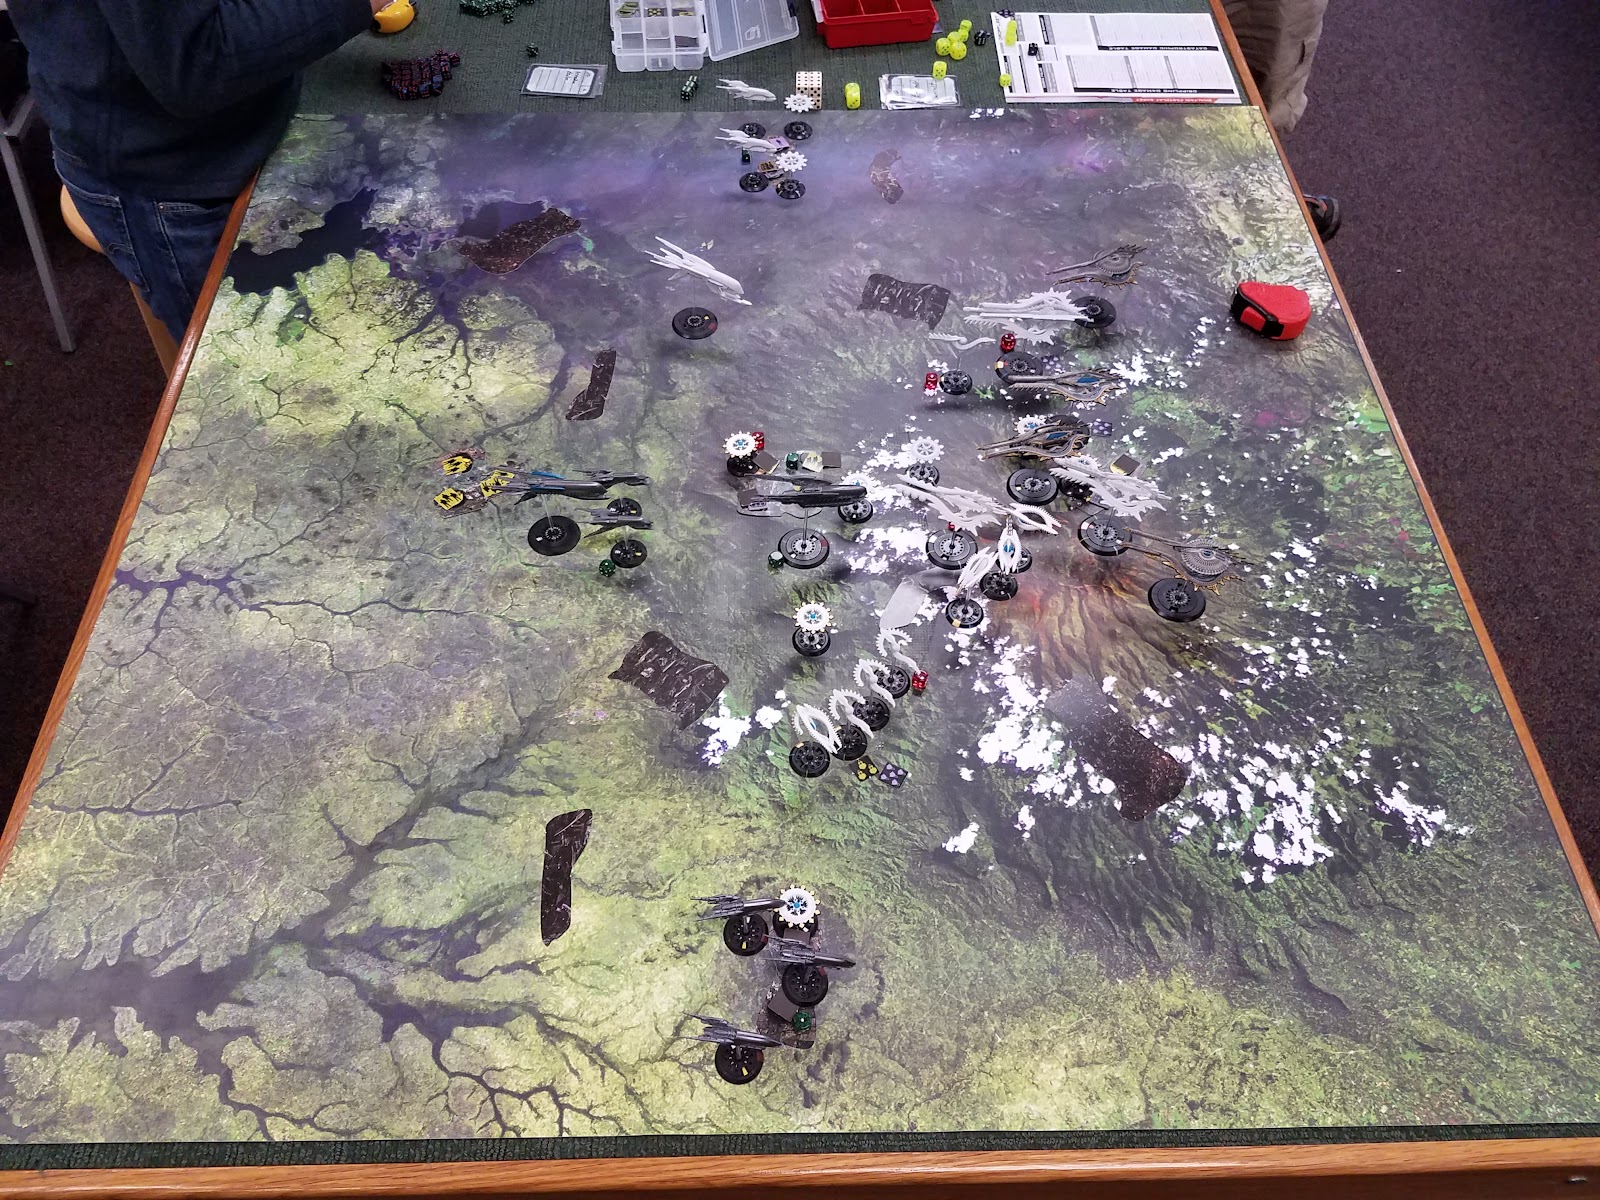
Shaltari- This turn, the heat really got cranked up! I took out the Orpheus with the Onyx/Amber/Topaz Vanguard, which gave me the middle cluster with little contest. He flew up the Europas, but the dice gods prevented him from doing much damage between them and Bellorophon. The frigates proceeded to get peppered off the board by a Weapons Free order on the Adamant. My Amethyst hunting party was able to remove the Hector, with the help from the Turquoise. Speaking of Amethyst: they were invincible this turn! The Leonidas puked out some 12 light calibre shots, and 8 medium shots, onto a single frigate, and didn’t do a single point of damage. The one frigate he shot at was within range of the Opal. So when I rolled my shield save, I only failed 2 (wut… lol) and rerolled those into successes. He then fired his CA at the same Amethyst and did a point of damage. Haha MVP of the game right there! At this point, everything except my Emeralds, and Basalt had shields raised.
Ground Asset - I sprinkled some single troops over as many sectors as possible, just to grab points. The biggest highlight on this turn is I remembered to roll my Charged Atmosphere! Which completely locked down the lower cluster, and allowed one to drop on the far sector. Our troops fought and unfortunately his brought a bunch of twigs to the gunfight. Not good.
PHR- After losing both my troopships in the center, along with my Orion and Hector as main support cruisers I knew the game was over. Especially after my Leonidas rolls 8 of 12 hits from my light calibers and 4 or 5 from my 8 medium calibers and all my CAW and do 1 damage to an Amethyst. I tried to bombard the crap out of the closest sector in the picture with my 3 Medea’s as could not land troops on them (stupid voidgates). Out of 6 bombardment rolls each turn starting turn 4 I only did a total of 2 or 3 damage on both sectors combined. I used my Bellerophon and Andromeda’s to launch bombers are targets of opportunity, but Levi was rolling well on his shield saves and it was getting very frustrating.
Turn 5

Turn 5: Continued Play.
He conceded last turn because I wiped out both of his troopships on the middle cluster, although since the score was really close and he still had some good firepower on the table, we decided to continue playing.
Shaltari- This turn was even more devastating than the last. I did not expect this to happen. As you can see I managed to clear house. The only thing left were his Medeas and they weren’t about to come out of atmosphere. Since I had some bombers on my Amethyst group, I decided to put them right in between the Ajax and Andromeda group, Leonidas. I unleashed the beams on the BC, and rolled really well. I don’t remember how many points I put on it, but I’m pretty sure between them, the Turquoise, and the Adamant, I brought it down to 2 hull. Which he then rammed my Basalt successfully and absolutely annihilated it. Just erased it. He poofed it. Between my Onyx/Amber/Topaz, the Emeralds, and the Topaz with the Adamant, I was able to destroy his Bellerophon, Ajax and Andromeda. This cleared up the board and gave me a free range to roam.
PHR- The only effective damage I did the entire game was this round when I rammed his Basalt with my Leonidas and destroyed it in one turn. I was hoping to have additional ships be destroyed from other explosions from the destroyed table roll, but no the dice gods did not favor this in my plea.
Turn 6

Turn 6: 58 (Shaltari) to 41 (PHR)
Shaltari- This turn went pretty quick. I ran my ships as far as I could go to pick up as many Critical locations as possible, along with the cluster/sector points. Took some potshots at his Medeas which did notta-thing since they were in atmo. (I actually got one of my Topaz’s alllll the way to the cluster on his side of the board.)
PHR- This turn was spent again trying to bombard sectors and control as much as I could in the end. This was not a fun turn in terms of strategy and tactics as I only had 5 Medea’s left on the table.
Game Recap
Shaltari- Wow. Just wow. I was fully expecting I’d get creamed this game because of how much ground game he’d have. But the disintegrator banks did some work. The Amethyst were fun, but I think 4 is probably the max I’d take. 6 just wouldn’t be gentlemanly, and not fun to play against. *cough George cough* The Adamant did better than I thought it would, but it also didn’t come under fire that much. I don’t like how it’s only really useful if you go Weapons Free!, but I’ll have to play a few more games with it to get a feel. All in all, the disintegrator banks were crazy good. I was really hoping the Particle special rule would be able to consistently output the damage the deal with PHR, but the sheer amount of 3+ shots coming out of a group with disintegrator banks is astronomical. Easily overwhelms ships.
PHR- If I were to play this scenario over with the same fleet I would have deployed totally different. I would have most likely deployed my Leonidas and Hector group along with my 4 Medea’s. By having my Leo and Hector on station before my troopships I would have been able to support them as they were arriving to the center cluster and provide the needed firepower to kill some ships. PHR troopships have the highest hit points in the cruiser tonnage level, but they are primary targets for the opponent. This is why I had an Orion with them for support, but it was killed too quickly. Shaltari disintegrator banks are deadly when they are coming from the entire fleet. I would relate this to the PHR broadsides, but might be just a little more effective in terms of the amount of damage they can put out. I would like to try this scenario again in the future and try these new found tactics of hindsight 20/20. Hope you all enjoyed this reading this and we will continue to bring you more bat reps as we can.
Credits:
For tokens, acrylic and MDF please check out The Model Exchange for all those needs, they have acrylic stations, clusters, debris, Battlegroup Spike and Layer trackers and so much more!
If you want to support us, you can join our Patreon and support us from there.
If you want to support us, you can join our Patreon and support us from there.
Wouldn't be gentlemanly, what... “Be polite, be professional, but have a plan to kill everybody you meet.” General Mad Dog Mattis.
ReplyDeleteIt is a war game be prepared for WAR!!!
With that being said I would have done this for the Shaltari
SR12 Vanguard battlegroup (290pts)
1 x Adamant - 200pts - H
2 x Topaz - 90pts - L
SR17 Vanguard battlegroup (365pts)
1 x Onyx - 165pts - H
1 x Amber - 110pts - M
2 x Topaz - 90pts - L
SR15 Line battlegroup (345pts)
1 x Emerald - 100pts - M
1 x Basalt - 145pts - M
1 x Emerald - 100pts - M
SR8 Line battlegroup (160pts)
1 x Turquoise - 115pts - M
3 x Voidgate - 45pts - L
SR5 Pathfinder battlegroup (232pts)
2 x Amethyst - 96pts - L
2 x Amethyst - 96pts - L
1 x Opal - 40pts - L
SR6 Pathfinder battlegroup (90pts)
3 x Voidgate - 45pts - L
3 x Voidgate - 45pts - L
Put the Opal with the Amethyst make them last a little longer and let the Turquoise move with more impunity.
~GeorgeFromWY
From where do you get this mat?
ReplyDeleteWargamming Mats, there are links in the introduction of this report.
ReplyDelete~GeorgeFromWy